The Uttar Pradesh government has implemented a new requirement for students seeking free tablets and smartphones. To qualify, students must complete Aadhaar verification via the Digishakti portal.
| Digishaktie Ekyc Link | Click Here |
This initiative aims to streamline the process and ensure that resources are allocated efficiently. Here’s a straightforward guide to help you navigate the eKYC process.
Why Aadhaar Verification Important On Digishaktie Portal
The Digishakti portal is a government initiative designed to provide eligible students with free tablets and smartphones as part of a welfare scheme. By utilizing Aadhaar-based eKYC, the government aims to ensure that benefits reach the rightful recipients, minimizing the risk of misuse. Completing the eKYC process is vital for verifying your identity and receiving the devices.
How to Complete eKYC on the Digishakti Portal
Step 1: Visit the Digishakti Website Start by going to the Digishakti website. Look for the button labeled “e-KYC through MeriPehchaan Portal” and click on it. You can also access it directly through the provided eKYC link above.
Step 2: Enter Your Information
Fill out the required fields on the screen carefully, then click the “Search” button.
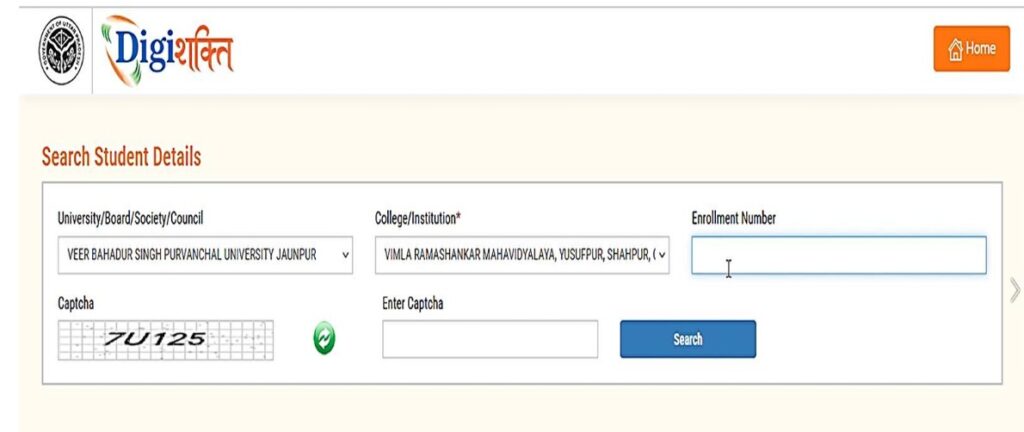
Step 3: Check Your eKYC Status
After clicking Search, your details will be displayed. If your Aadhaar e-KYC status reads “Pending,” click on “Verify through Login Using e-Pramaan MeriPehchaan.”
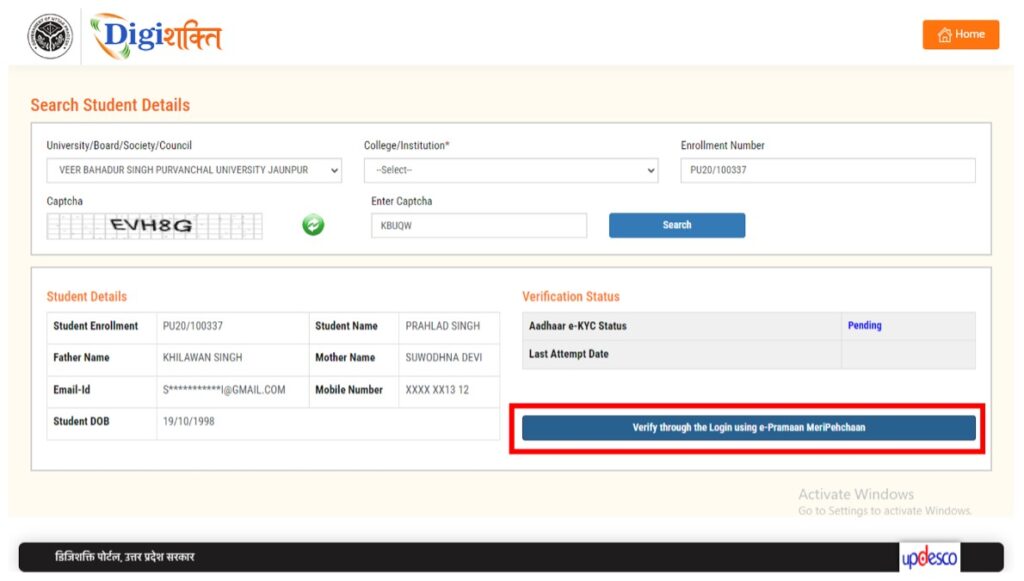
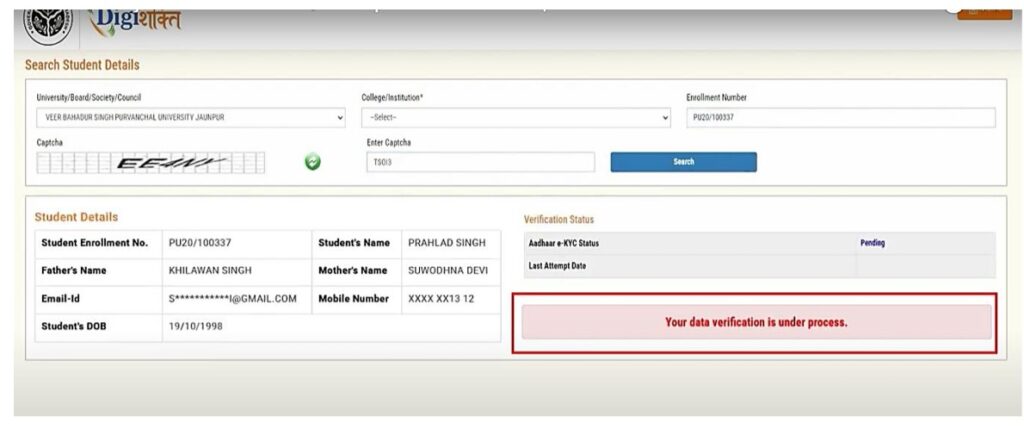
Note: If your data is still under verification, you might see a message indicating that your verification is in progress.
Step 4: Sign In or Sign Up on MeriPehchaan
You will be redirected to the MeriPehchaan portal. If you already have an account, sign in with your credentials. If you’re new, click on “New user? Sign up for MeriPehchaan” to create an account.
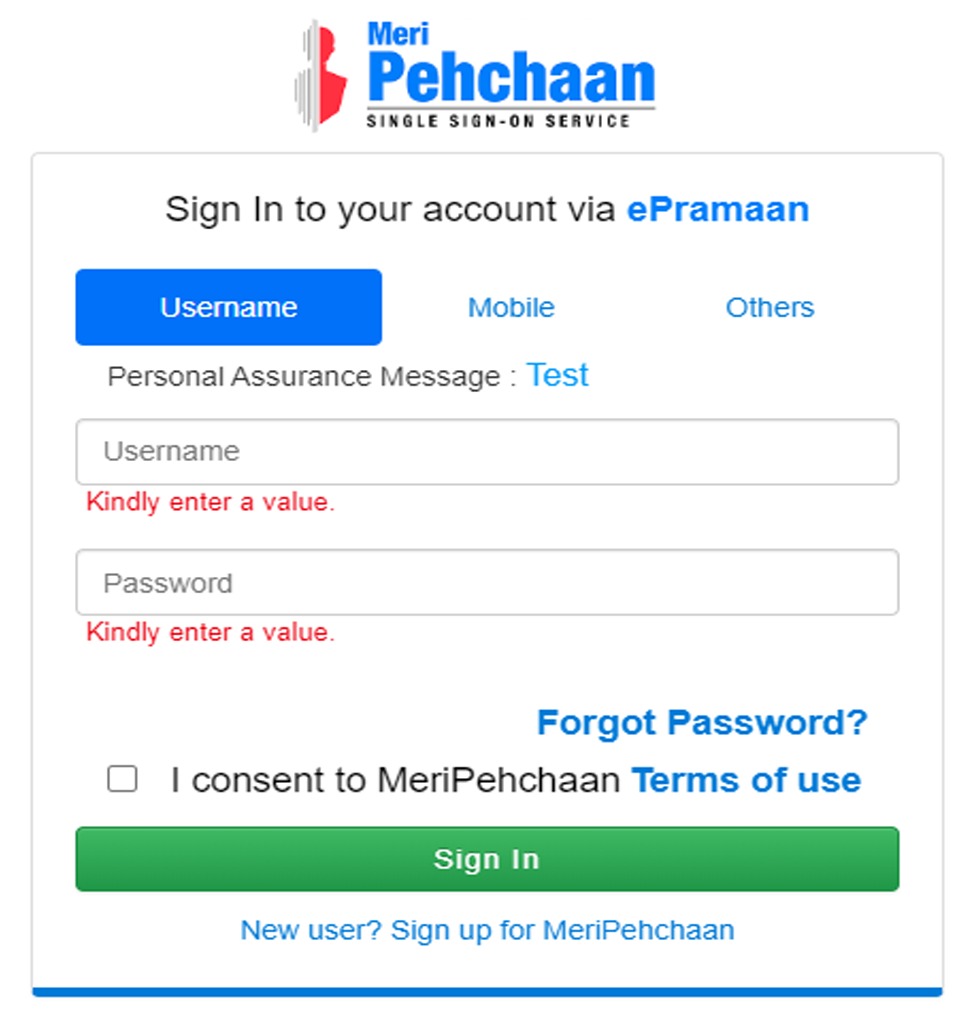
Step 5: Verify Your Mobile Number
New users will need to enter their mobile number and click “Generate OTP.” You’ll receive a One-Time Password (OTP) via SMS. Enter the OTP to verify your mobile number.
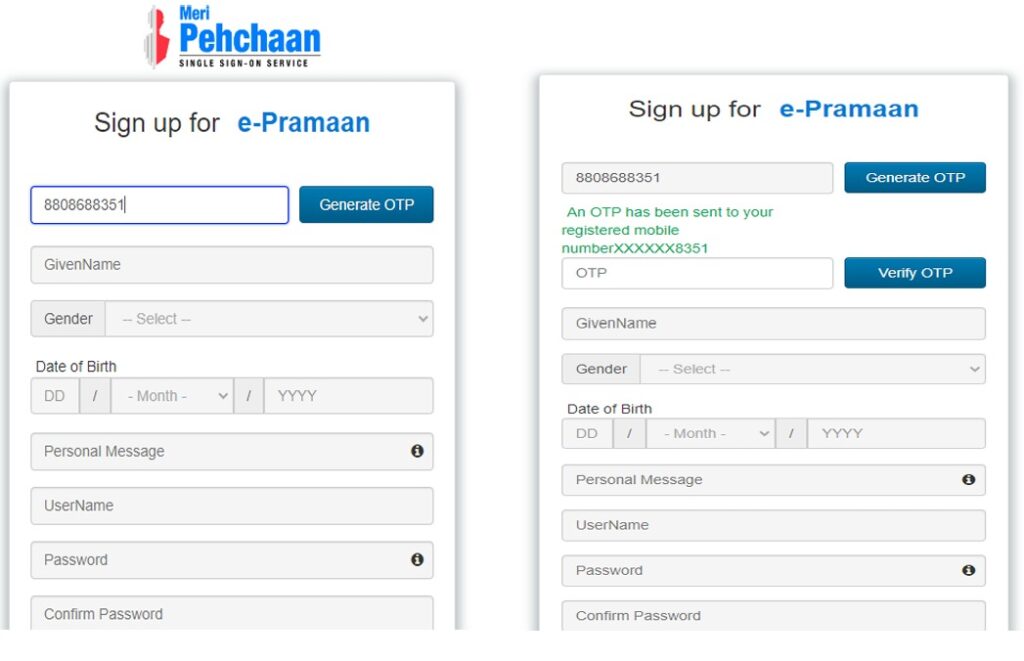
Step 6: Accept Terms and Conditions
After verifying your mobile number, read and accept the terms and conditions. Then click “Sign Up” to complete your registration.
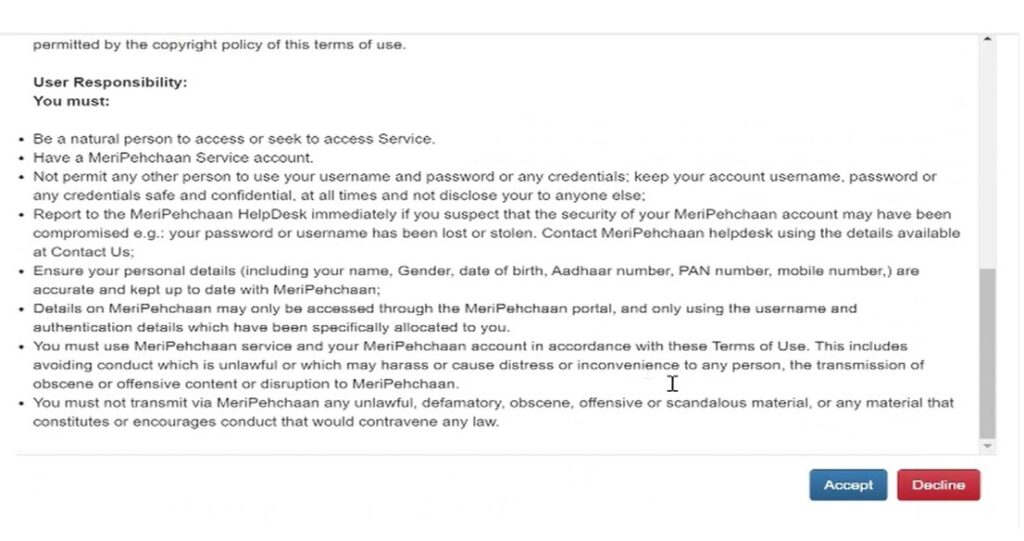
Step 7: Enter Your Aadhaar Information
After logging in, you’ll be directed to the Aadhaar e-KYC page. Enter your Aadhaar number and choose how you’d like to receive your OTP—via mobile or email.
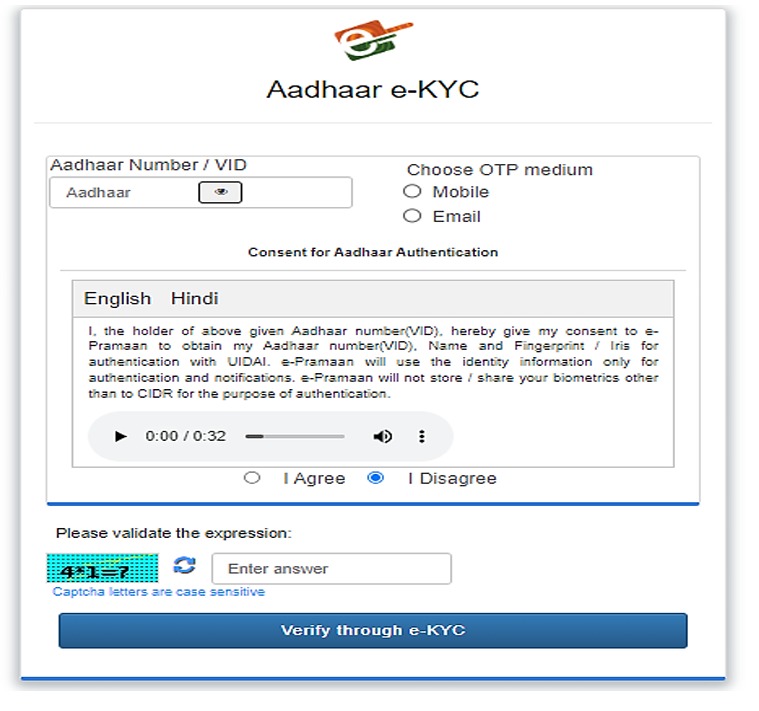
Step 8: Verify the OTP
An OTP will be sent to your registered mobile number or email. Enter this OTP in the designated box and click “Verify.”
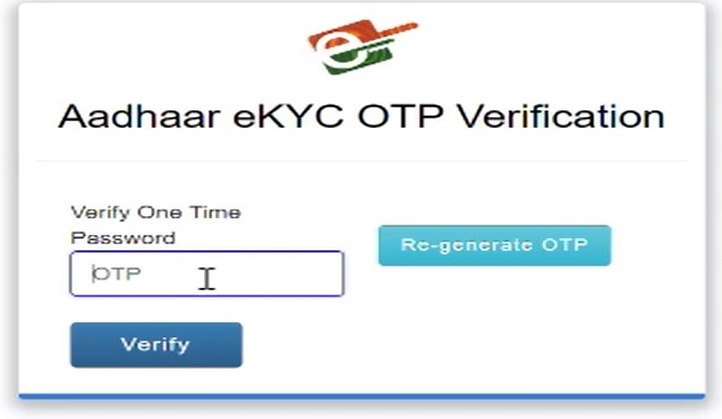
Step 9: Confirmation of Success
If all goes well, you’ll receive a success message confirming your verification.
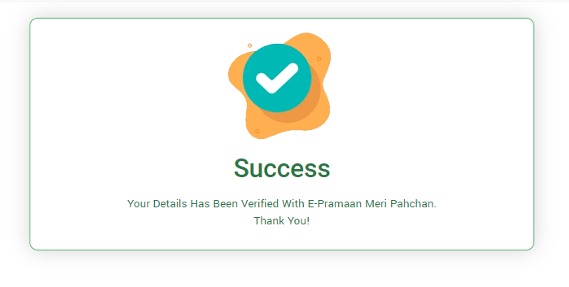
Step 10: Check Your Verification Status
Once your Aadhaar is successfully verified, the verification button will disappear, and your status on the Digishakti portal will change to “Verified.”
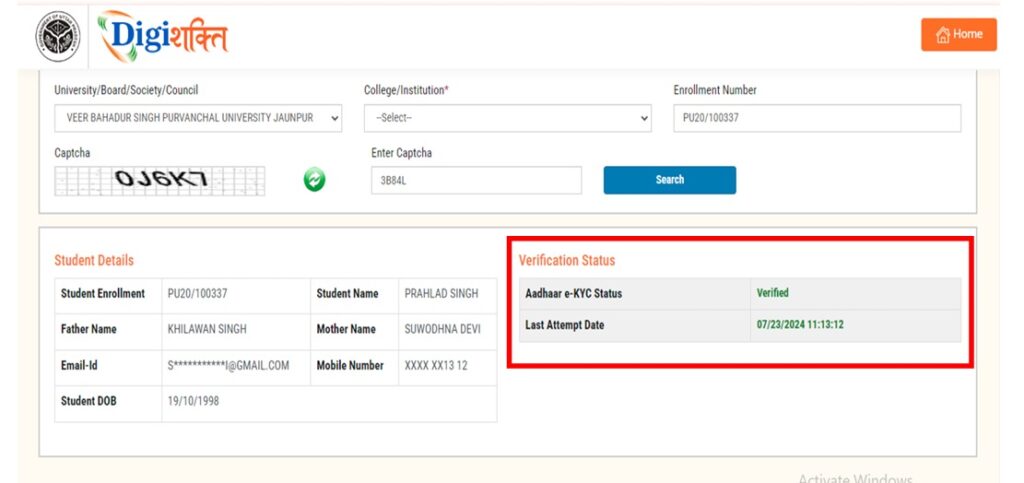
Step 11: What to Do If Your Verification Fails
If your status indicates “Failed,” it suggests a mismatch between your Digishakti and Aadhaar data. You can:
- Contact your Institution Nodal Officer to correct the information on the Digishakti portal.
- Update your Aadhaar details as needed.
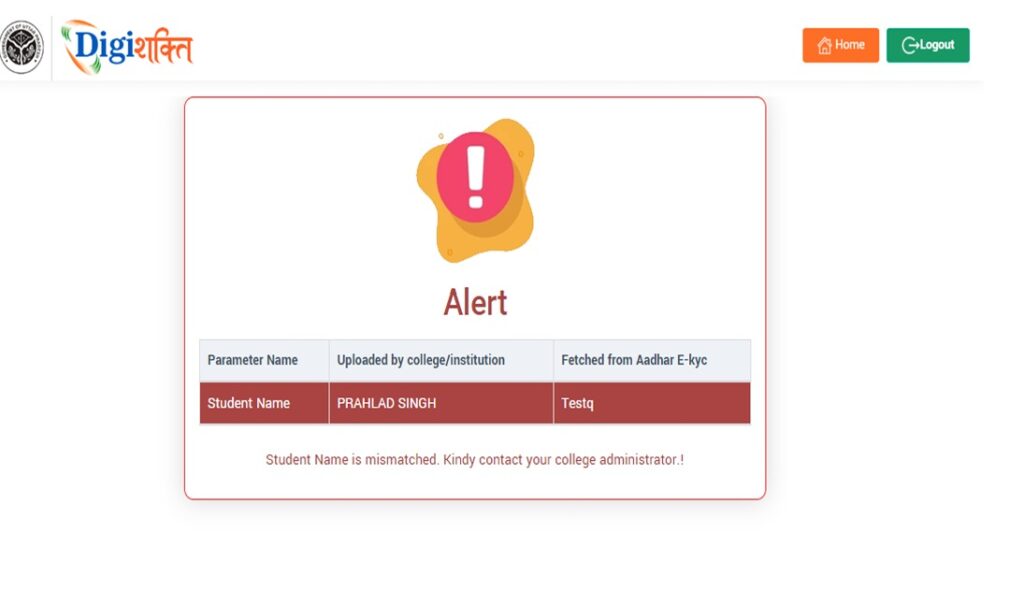
Once corrections are made, your data will go through the verification process again, starting with your institution’s approval.
What Happens After Verification?
If your status shows as “Verified,” your information will be visible to your institute, which will forward it to the District Nodal Officer for approval. If your data is already sent, it will be available for selection at the District Nodal Officer level.
What If the Details Don’t Match?
If the details (e.g., name, gender, date of birth) on the Digishakti portal don’t align with your Aadhaar information, a mismatch alert will be displayed, highlighting the discrepancies.
FAQs: Digishakti Portal eKYC Online
What is the Digishakti Portal? The Digishakti portal is an online platform established by the Uttar Pradesh government to provide free tablets and smartphones to college and university students. It streamlines the entire process, from collecting student information to distributing devices and ensuring proper follow-up.
How to Check Your Digishakti eKYC Status?
- Visit the official Digishakti website.
- Fill in your details: Name, Registration number, Aadhaar number, and Mobile number.
- Click “Submit” or “Check Status” to view your eKYC status.
Common eKYC Status Messages:
- Pending: Your verification is still in progress.
- Verified: Your eKYC is successful.
- Rejected: There’s an issue with your Aadhaar or documents.
- Error: A problem occurred during verification.
If you encounter issues, please contact the Digishakti helpline or your college’s IT department for assistance.
Receiving the Message “Please Enter a Valid Enrollment Number” If you see this message, consider the following possibilities:
- You may have entered an incorrect enrollment number. Please verify and re-enter.
- Your admission might be recent, and your details are not yet updated.
- Your study center has yet to submit your information.
- You may not be eligible for a free tablet or smartphone.